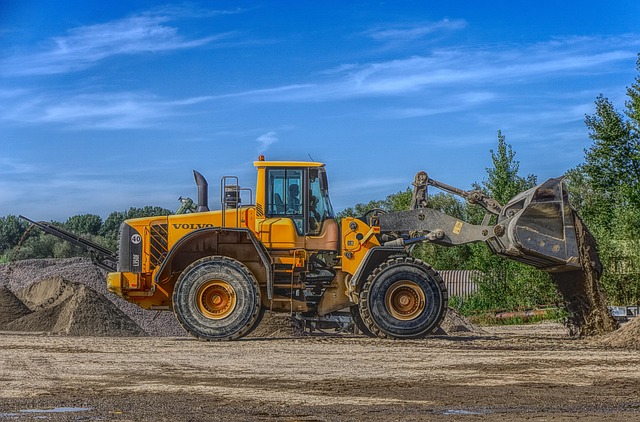
Thorough inspection identifies mold and damage extent. Visual assessment guides drywall replacement decisions. Safe removal of contaminated drywall involves cutting, containing, and cleaning. Subfloor drying addresses moisture roots. Replacing with mold-resistant sheets prevents future growth. These steps in mold remediation ensure effective, cost-efficient restoration.
“Discover the essential steps in mold remediation, especially regarding drywall replacement. When addressing mold growth, assessing the extent of damage is crucial. This guide breaks down the process, from evaluating drywall and subfloor conditions to safe removal, proper drying, and installation of new drywall for long-term protection. Learn when replacement is necessary and ensure effective, safe restoration.”
- Assess Mold Extent and Drywall Damage
- Determine Drywall Replacement Necessity
- Safe Removal of Contaminated Drywall
- Proper Subfloor Drying and Preparation
- Install New Drywall for Long-Term Protection
Assess Mold Extent and Drywall Damage

When assessing mold growth, it’s crucial to understand the extent of both the mold and the resulting drywall damage. The first step in any mold remediation project is thorough inspection. This involves visual assessment and sometimes moisture meters to gauge water intrusion and humidity levels. Once identified, mold-infected areas should be carefully evaluated for scope and severity.
In many cases, mold thrives behind walls, so it’s essential to check for hidden damage or blackened, discolored drywall. If the mold is extensive or the drywall shows signs of significant degradation, replacement might be necessary as part of your steps in mold remediation. However, minor damage can sometimes be repaired, allowing you to save costs and retain the original structure.
Determine Drywall Replacement Necessity

When considering the steps in mold remediation, determining whether drywall replacement is necessary is a crucial step. Not all cases require removing and replacing drywall; it depends on the extent of mold growth and the damage caused. Visual inspection is key; heavily discolored or damaged drywall may need to be replaced, but smaller patches can often be treated without removal.
If mold has penetrated deeply into the drywall or if there are signs of water damage or wall degradation, replacement might be inevitable. However, professionals suggest that before making a decision, it’s important to assess the structural integrity of the affected area and consult with a remediation expert. This ensures that the right course of action is taken, balancing cost-effectiveness with comprehensive mold remediation.
Safe Removal of Contaminated Drywall

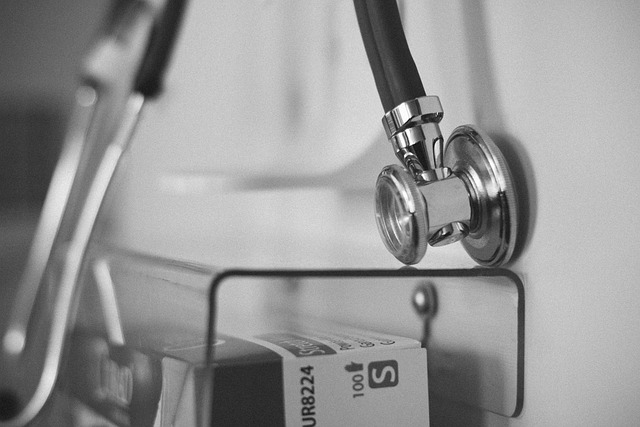
When undertaking mold remediation, safely removing contaminated drywall is a critical step in the process. It’s crucial to avoid spreading mold spores during this process. Professional remediators often employ specific techniques like cutting and containing the affected area to prevent cross-contamination. Personal protective equipment (PPE), including gloves, masks, and eye protection, is essential for safety.
There are several steps involved in the safe removal of contaminated drywall. These include identifying and marking the moldy areas, cutting out the infected drywall, placing it in sealed bags for disposal, and thoroughly cleaning the remaining surfaces with a dehumidifier and anti-mold solutions. This meticulous approach ensures that not only is the visible mold removed, but any hidden spores or mycelia are also eliminated, making it safer for occupants to return to their space.
Proper Subfloor Drying and Preparation
Proper Subfloor Drying and Preparation is a critical step in effective mold remediation, ensuring that the root cause of moisture issues is addressed. Before replacing drywall or proceeding with any restoration work, it’s essential to verify that the underlying subfloor is dry. This involves several key steps in the mold remediation process: first, assess the level of water damage and ensure all visible water sources are eliminated. Then, use specialized equipment like dehumidifiers to lower humidity levels, allowing the subfloor to dry completely. Monitoring the drying process using moisture meters ensures no hidden moisture remains, preventing future mold growth. Once the subfloor is thoroughly dry, it’s ready for any necessary repairs or replacement, providing a solid foundation for successful restoration and preventing costly recurrences.
Install New Drywall for Long-Term Protection

After completing the initial steps in mold remediation, such as containing the affected area and removing any moldy materials, one crucial consideration is whether to install new drywall for long-term protection. Replacing drywall is often recommended due to its vulnerability to future mold growth if not addressed properly.
To ensure effective protection, it’s essential to use specialized products designed for mold-resistant drywall during installation. This process involves carefully measuring and cutting the new sheets to fit the space, ensuring seamless coverage. Proper sealing of joints and edges with tape and compound not only enhances structural integrity but also creates a barrier against moisture infiltration, which is vital in preventing future mold development as part of comprehensive steps in mold remediation.